Table of Contents
Azure Functions is the perfect tool for sending emails from websites and apps. It’s lightweight, fast, and scalable. Add SendGrid to it and you have a match made in heaven.
In one of our products at Expeed, we pair Azure Functions with blob storage, queues, and table storage from an Azure Storage account, with SendGrid sending millions of emails a month on behalf of our customers.
But you don’t have to send large numbers to take advantage of these tools.
In this post, we’ll look at setting up our Azure Functions app, getting an API key from Sendgrid, and wiring up the email sending.
If you don’t have a SendGrid account, look at my post SendGrid Account Setup and Domain Verification with Azure DNS which walks you through how to set up a SendGrid account and verify your domain.
Create Azure Functions Project
Our first step is to create our Azure Functions project in Visual Studio.
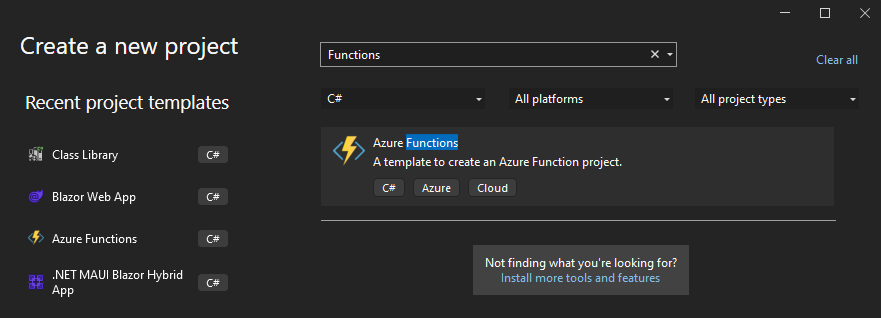
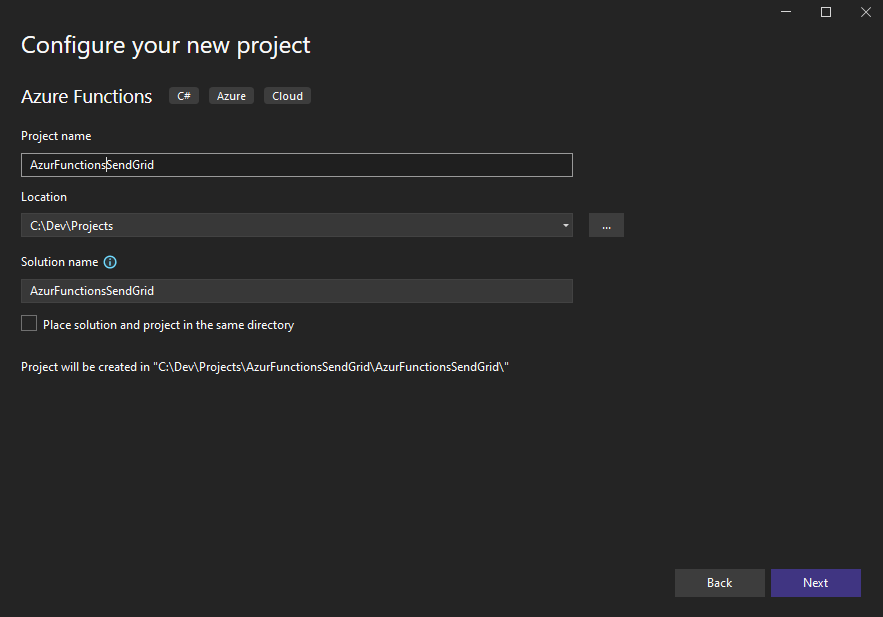
In the first two screenshots above, we’re filtering the project types for the Azure Functions, and selecting the project name and location.
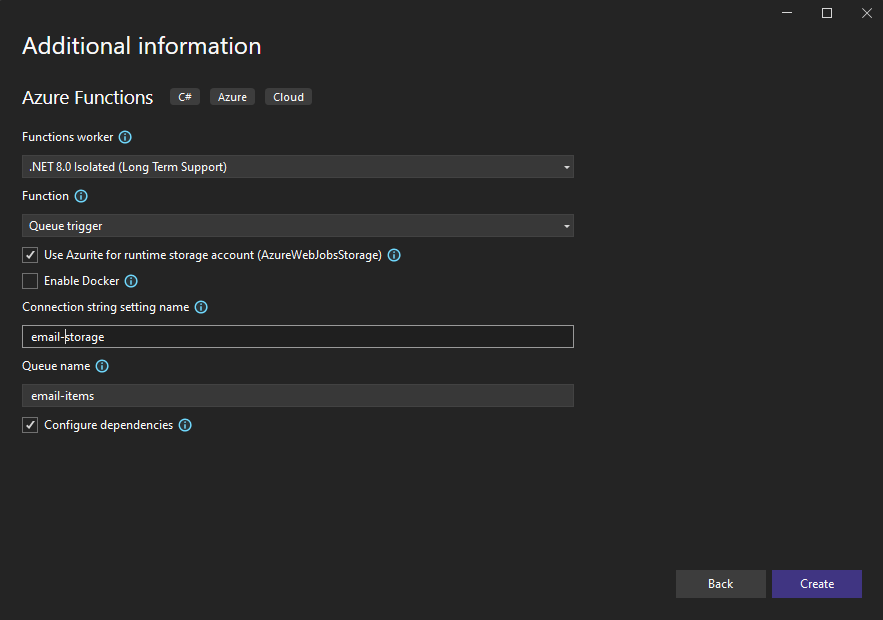
The last screenshot above shows the project options.
In this example, we’ll be using the newest version of dotnet, which at this point, is .NET 8, so we select the Functions worker as .NET 8.0 Isolated.
The default example function trigger is a HTTP trigger, but we’ll be using a storage queue trigger to start with, so let’s select that.
Azurite is an Azure storage emulator that runs locally on your PC. This is a great tool to let you run your functions quickly and easily on your local machine, so make sure that is checked.
We can now enter a Connection string setting name, which is the name of the setting it will look for that holds the storage connection string. This is NOT the actual connection string itself. This is an important distinction.
We can also pre-fill our queue name with something relevant like email-items. We’ll set this up later when we set up our storage account.
Click Create to create your Azure Functions app.
Configuring Dependencies for your Azure Functions Project
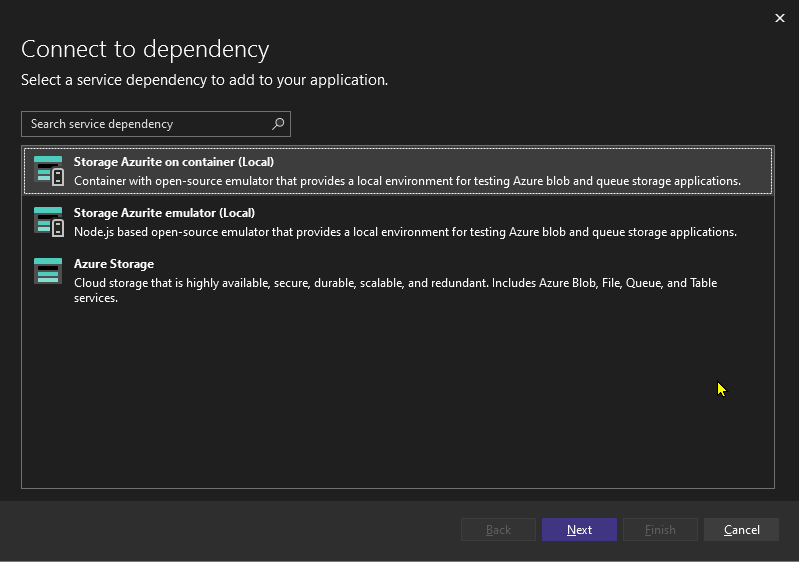
This next page took me by surprise a little as I’ve not seen this screen pop up before. It must be a change with the latest version of Visual Studio. It’s giving me the option of running Azurite as a container, or as a Node.js based local emulator. I have docker installed and haven’t tried this before, so I selected the first option to run it inside a container. What could possibly go wrong!
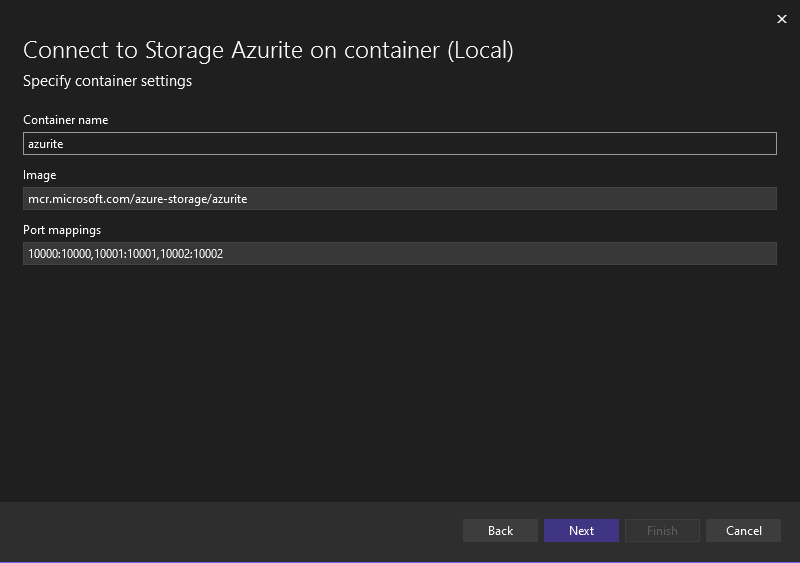
We then get prompted to enter our container name, image, and the required ports. I do have the Node.js based Azurite on my PC, and it seems to use the same port, so let’s see if we get any port conflicts!
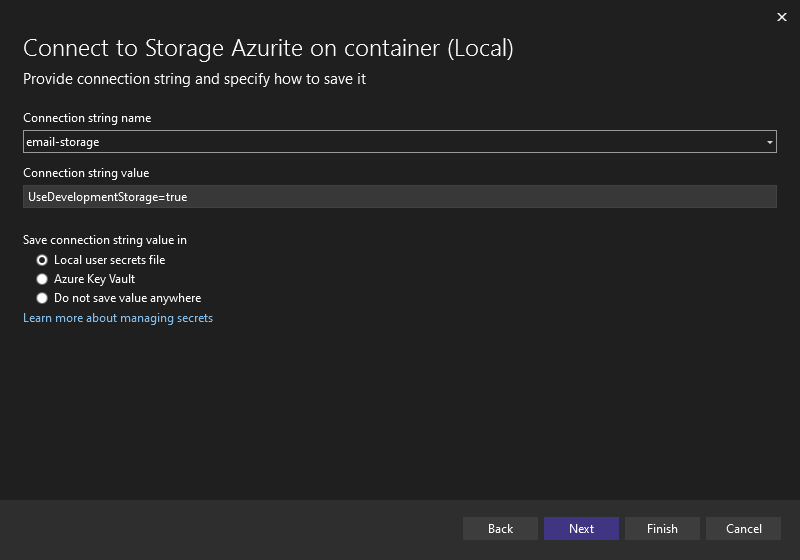
Next up we get prompted for our connection string settings again for it to map the connection string setting name that we set earlier to the container. We also get to choose where we save these settings. Typically I’ll go with the local user secrets file.
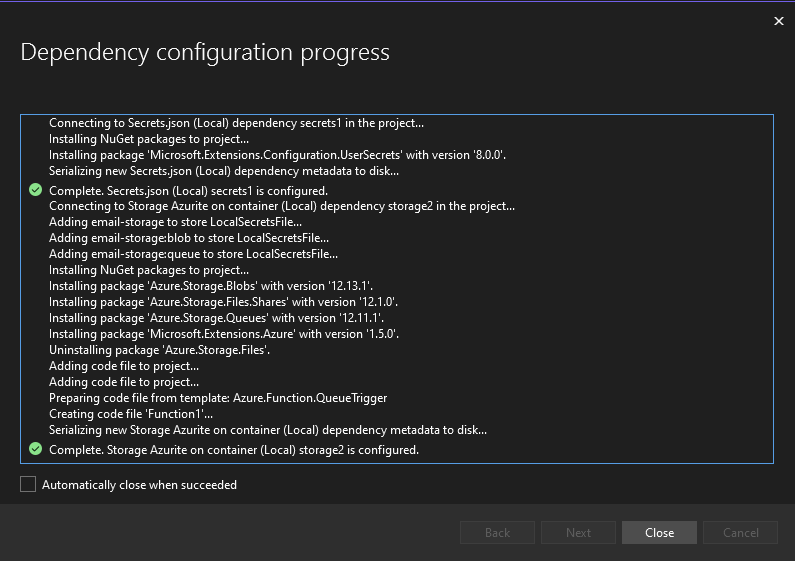
The final step in the process is confirming the dependencies information, so we can click Finish to configure all those settings. We then get a nice little summary of what it’s done with some happy little green check marks.
If I click over into Docker Desktop now, I can see that it’s created the container and it’s running, seemingly without any port conflicts.

Update Nuget Packages
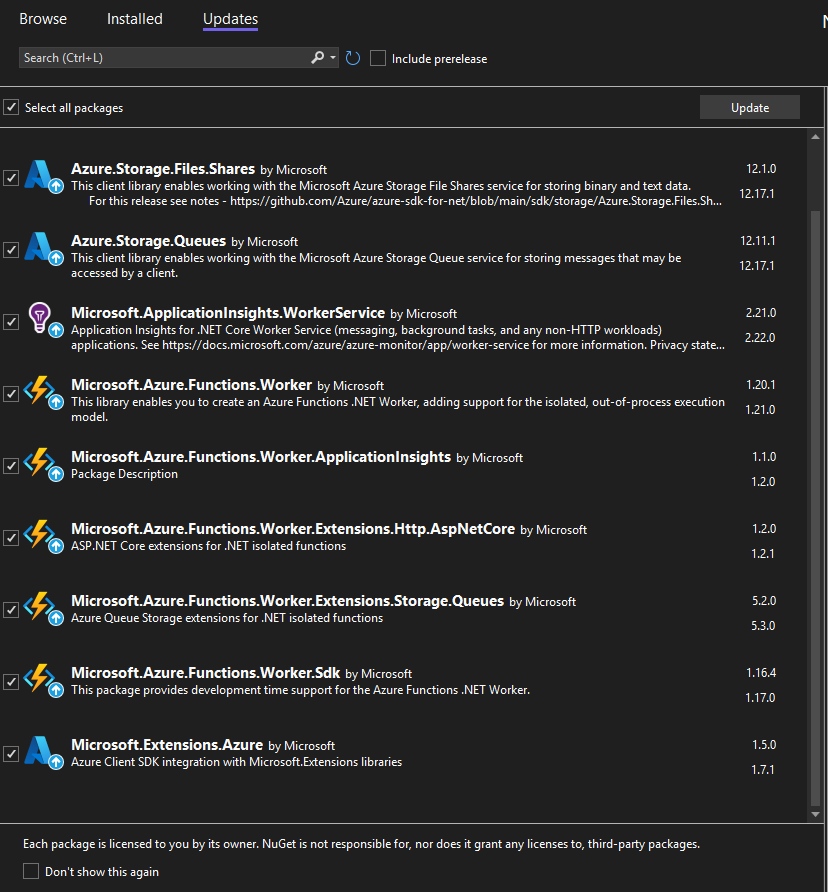
Whenever I begin a new project, I like to go in and update all Nuget packages to the latest versions.
Right-click on the Project, go to Manage Nuget Packages, then to the Updates list, click on Select all packages and Update.
Once this is done, rebuild the solution to make sure everything builds properly.
While we’re in the Nuget area, let’s add in the packages we’ll need.
We need to Browser the Nuget packages and search for SendGrid. We then need to add the SendGrid and SendGrid.Extension.DependencyInjection packages
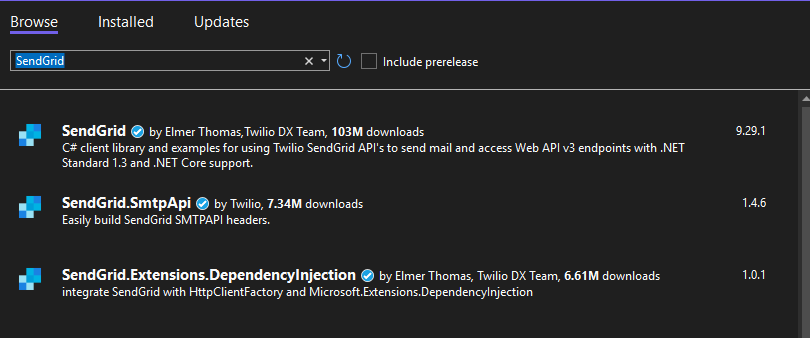
We also need to add Microsoft.Azure.Functions.Worker.Extensions.SendGrid to allow us to use the built-in SendGrid output attribute integration.
Writing an Azure Function to send emails
Our first function stub has now been created for us as well.
As we can see, it’s being triggered by a queue item hitting the email-items queue on our storage connection named email-storage. The type of the variable is a QueueMessage. We’ll change this in a little while to take advantage of another great Functions feature: auto-deserialisation.
using System;
using Azure.Storage.Queues.Models;
using Microsoft.Azure.Functions.Worker;
using Microsoft.Extensions.Logging;

namespace AzurFunctionsSendGrid
{
    public class Function1
    {
        private readonly ILogger<Function1> _logger;

        public Function1(ILogger<Function1> logger)
        {
            _logger = logger;
        }

        [Function(nameof(Function1))]
        public void Run([QueueTrigger("email-items", Connection = "email-storage")] QueueMessage message)
        {
            _logger.LogInformation($"C# Queue trigger function processed: {message.MessageText}");
        }
    }
}
Let’s fill this function out a little, and then talk about the changes we’ve made.
using AzureFunctionsSendGrid.Objects;
using Microsoft.Azure.Functions.Worker;
using Microsoft.Extensions.Logging;
using SendGrid.Helpers.Mail;

namespace AzureFunctionsSendGrid
{
    public class SendEmail
    {
        private readonly ILogger<SendEmail> _logger;

        public SendEmail(ILogger<SendEmail> logger)
        {
            _logger = logger;
        }

        [Function(nameof(SendEmail))]
        [SendGridOutput(ApiKey = "SendGridAPI")]
        public SendGridMessage Run([QueueTrigger("email-items", Connection = "email-storage")] EmailItem emailItem)
        {
            try
            {
                _logger.LogInformation($"SendGrid email send triggered by queue item");

                var email = new SendGridMessage();

                email.AddTo(emailItem.To);
                email.From = email.From;
                email.Subject = emailItem.Subject;
                email.HtmlContent = email.HtmlContent;

                return email;

            }
            catch (Exception ex)
            {
                _logger.LogError(ex, "Error sending email");
                throw;
            }
        }
    }
}
If you look at the method signature now, you’ll see that we’ve made three changes.
[SendGridOutput(ApiKey = "SendGridAPI")]
public SendGridMessage Run([QueueTrigger("email-items", Connection = "storage")] EmailItem emailItem)- We’ve added the SendGridOutput attribute
- We’ve changed the return type to SendGridMessage
- We changed the bound type on the trigger to a POCO class named EmailItem. The EmailItem class looks like below.
public class EmailItem
{
    public string To { get; set; } = string.Empty;
    public string From { get; set; } = string.Empty;
    public string Subject { get; set; } = string.Empty;
    public string HtmlBody { get; set; } = string.Empty;
}
The “SendGridAPI” value on the ApiKey parameter on the attribute is the name of the setting in our local.settings.json that houses our SendGridAPI.
If you don’t have a SendGrid account, you can follow my article https://simonholman.dev/sendgrid-account-setup-and-domain-verification-with-azure-dns
Now our function is expecting a queue message of type EmailItem like below and will return a type of SendGirdMessage.
{
	"to": "simon@simonholman.dev",
	"from": "simon@simonholman.dev",
	"subject": "Hello from Azure Functions",
	"htmlbody": "<h1>Hello from Azure Functions</h1>"
}
Configure Azure Functions settings
The function is now expecting queue items to arrive in a queue named “email-items” in a storage account with a connection string configured using the value “Storage” in the local.settings.json.
I advise for testing to use the development storage that targets Azurite by setting this value as you see below in the local.settings.json
{
  "IsEncrypted": false,
  "Values": {
    "AzureWebJobsStorage": "UseDevelopmentStorage=true",
    "FUNCTIONS_WORKER_RUNTIME": "dotnet-isolated",
    "Storage": "UseDevelopmentStorage=true",
    "SendGridAPI": "sendgrid-api-key"
  }
}
From here, the rest of the function code is fairly self-explanatory. We’re creating a new SendGridMessage object, setting the values from our input message, and returning the message.
The return of the email object works in conjunction with the SendGridOutput attribute to send the email through the configured SendGrid account.
We’re ALMOST ready to start sending emails, but we need to make one change first due a pesky json serialisation issue that’s documented at https://simonholman.dev/error-sending-email-via-sendgrid-from-azure-functions
Create a new file named WorkerConfigurationExtensions.cs in a folder named Extensions and add the following code to it.
You will need to add the Microsoft.Azure.Core.NewtonsoftJson library in through Nuget.
public static class WorkerConfigurationExtensions
{

    public static IFunctionsWorkerApplicationBuilder UseNewtonsoftJson(this IFunctionsWorkerApplicationBuilder builder)
    {
        builder.Services.Configure<WorkerOptions>(workerOptions =>
        {
            var settings = NewtonsoftJsonObjectSerializer.CreateJsonSerializerSettings();
            settings.ContractResolver = new CamelCasePropertyNamesContractResolver();
            settings.NullValueHandling = NullValueHandling.Ignore;

            workerOptions.Serializer = new NewtonsoftJsonObjectSerializer(settings);
        });

        return builder;
    }
}
Then switch over to the Program.cs and update as below.
var host = new HostBuilder()
    .ConfigureFunctionsWebApplication((worker) =>
    {
        worker.UseNewtonsoftJson();
    })
    .ConfigureServices(services =>
    {
        services.AddApplicationInsightsTelemetryWorkerService();
        services.ConfigureFunctionsApplicationInsights();
    })
    .Build();

host.Run();
Now you can run your Azure Functions app and add a message (formatted like the example above) into a queue named “email-items” and your emails will send.
