Azure SQL is one of my favourite Azure services. After many years of managing SQL Servers and databases, I can say that spinning up a database on a managed SQL server with variable resources per database is heavenly. Creating a database on Azure SQL is very quick and easy to do.
To create a new Azure SQL Database, you need to click on the hamburger menu in the top left-hand corner of the Azure portal, then click Create a resource. This takes you to the Marketplace where you can search for “SQL Database” and get the results below.

The resource shown under the yellow mouse hand is the one you want to select.
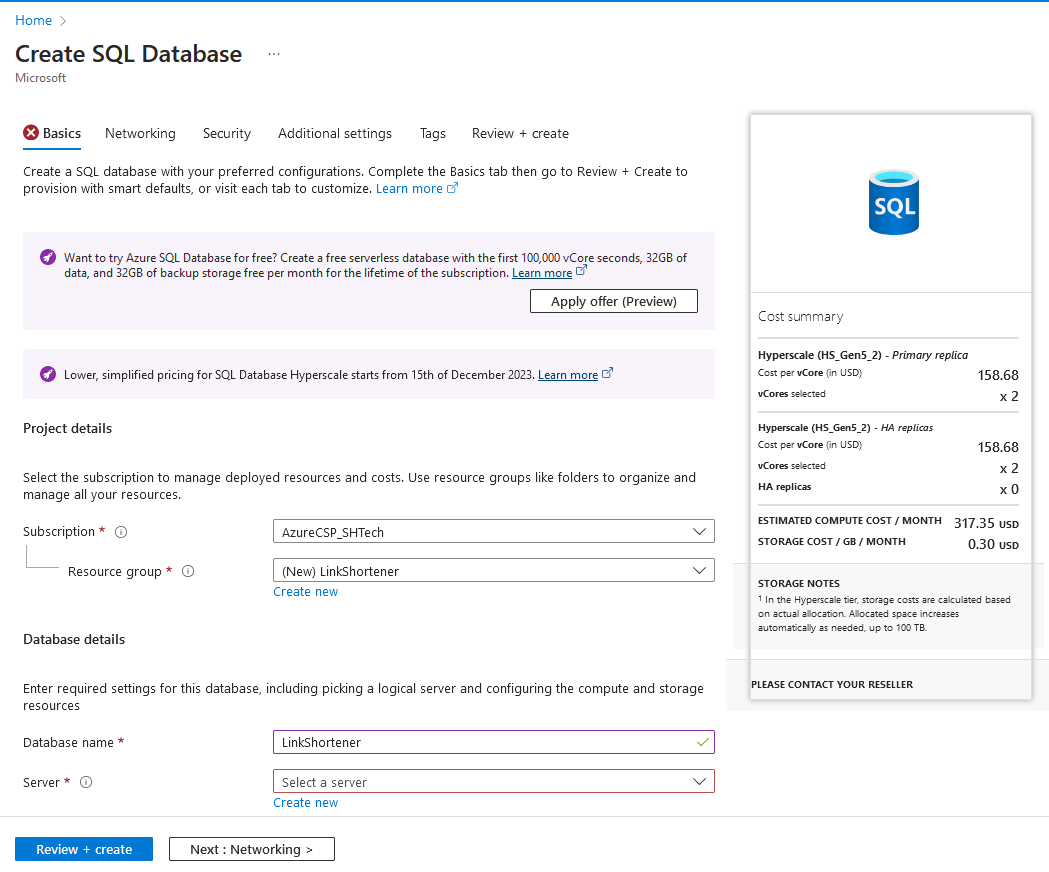
From there, you can configure your database and its associated server and compute/performance level.
Firstly, select the Subscription and Resource group you want to place the database in and give the database a name.
You can ignore the pricing information to the right for now as that will change when you create your server and select the performance level
From here, assuming you don’t have a server configured already, you can select Create new to create a new server.
On the Create SQL Database Server blade, enter your required server name, and select the Azure Location where you want your data housed.
You can select your authentication method. If you don’t have Microsoft Entra configured or don’t want to use it, select Use SQL authentication. An explanation of the integration with Microsoft Entra (formerly Microsoft Azure AD) is beyond the scope of this article.
Provide a Server admin login name. This should be a difficult-to-guess username and enter and confirm a strong password. I STRONGLY recommend to anyone who will listen to use a password management system like NordPass or 1Password.

Once you’ve added your server authentication settings and clicked Ok, you’ll be taken back to the database set-up blade where you can choose your Compute and storage options.
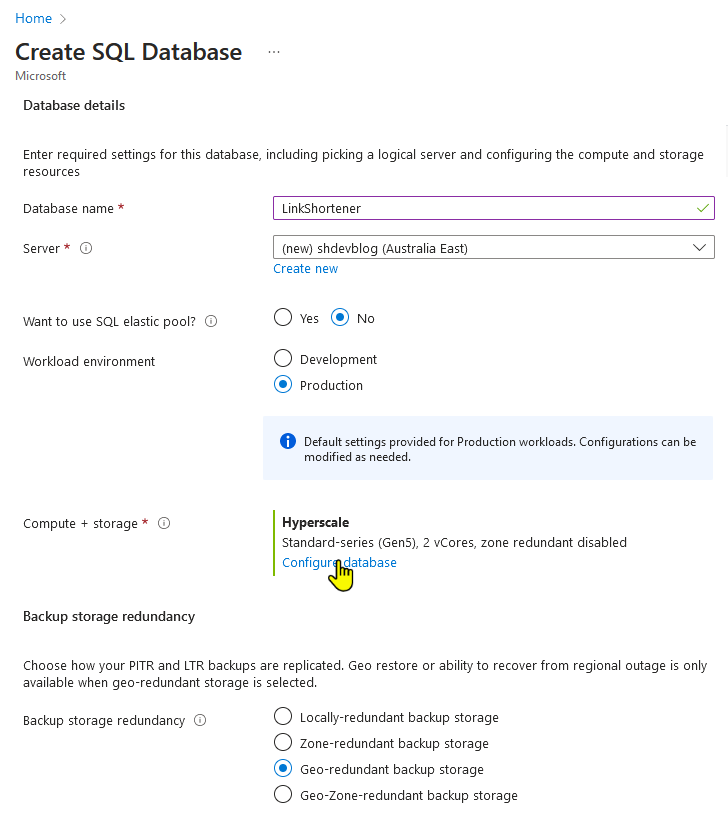
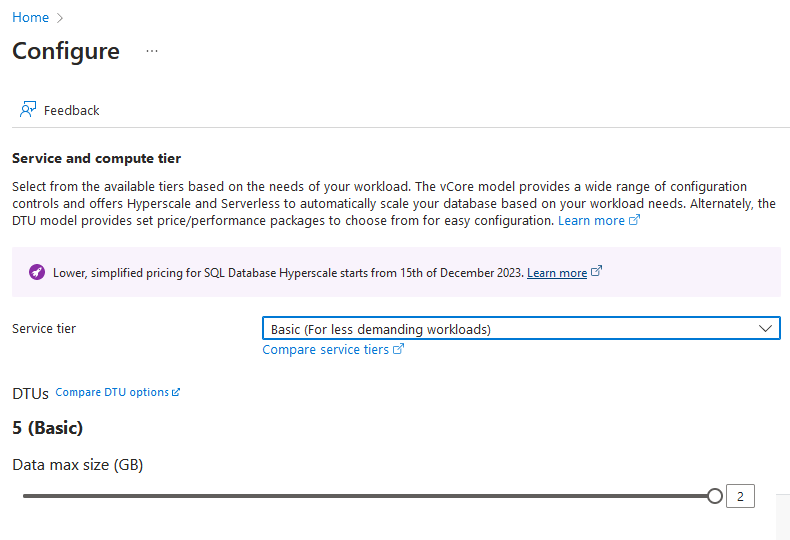
Click on the Configure database link to be taken to the Service and compute tier blade.
You now have the option to choose your Service tier. This selection will decide the ongoing cost of your database.
Join the mailing list to stay up to date with published articles
As this is an intro tutorial, we’ll only look at the DTU-based purchasing model for now.
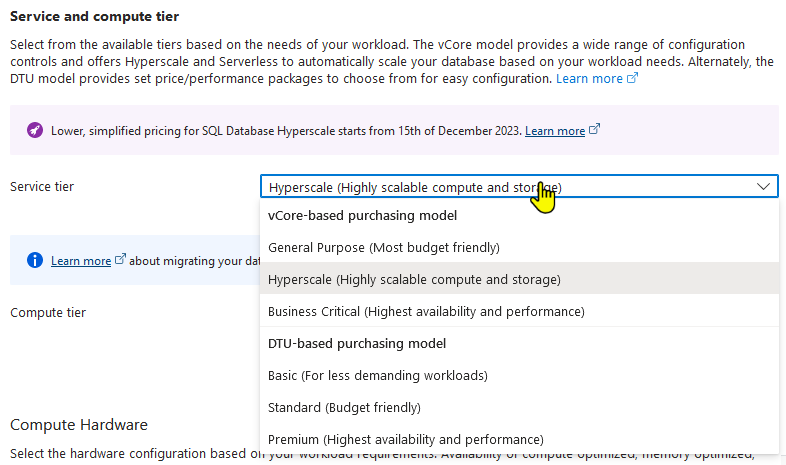
If you’re just setting up your database, I would advise selecting the Basic model. You can always increase to a Standard or Premium model once you go live or your performance or storage requirements change. Then click Apply.
As my subscription is a CSP-based subscription, I often don’t see estimated costs within the portal. For local cost guidelines, I recommend checking out the Azure Calculator for SQL Databases.
A Basic service tier database with 2GB of disk space costs about $7.85 Australian Dollars per month. For a small website or application, that’s a fantastic price for a managed SQL database (in my opinion)
The next option is to select your backup storage redundancy. This will of course depend on your disaster recovery plan as to which option you require.
As I like to have a completely isolated offsite backup set up, I often choose Locally-redundant backup storage and then put in place an automated offsite database backup to another storage platform like AWS using a tool like SQLBackupAndFTP.
If you elect for Geo-redundant backup storage, be aware that you will be paying for backup storage in multiple locations as well as the data transfer of those backups between the Geo-Locations.

Clicking Next will take you to the Networking blade of the set-up.
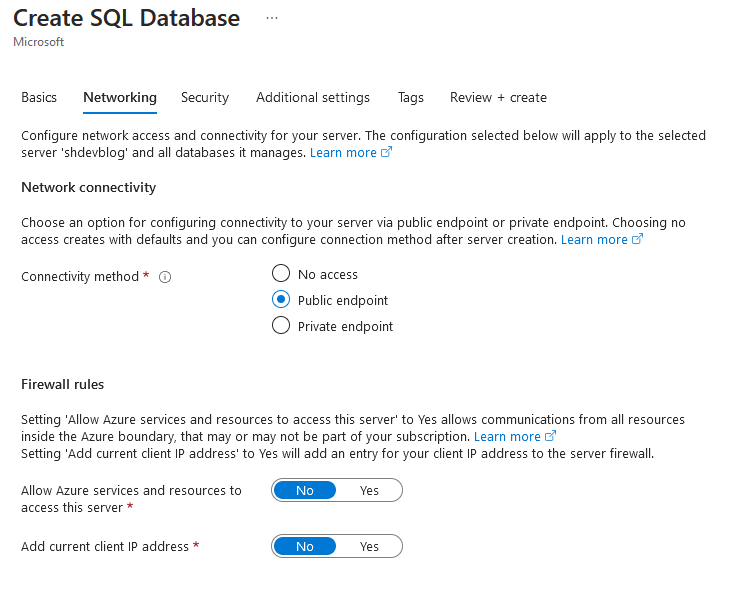
The default Connectivity option is No access, but that doesn’t allow you to use your database, so you need to choose between Public and Private. If you want to connect from the outside world via SQL Server Management Studio, or external services, then select Public. If you know you ONLY want to be able to connect from within the Azure system via a Private endpoint, select Private.
As we’ll be connecting via SSMS, we’ll select Public for our example.
Configuring private endpoints is beyond the scope of this article.
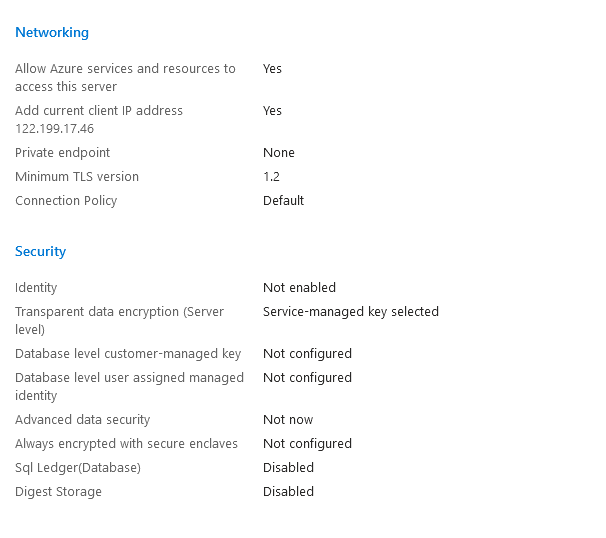
When selecting Public, you’ll be prompted to Allow Azure services and resources to access this server. This includes services like Azure App Service and Azure VMs. Assuming you’re deploying services to Azure that talk to this database, enable this option.
If you’re planning on connecting to your database from the internet connection you’re currently on, then enable the Add current client IP address option as well.
Click Next to move to the Security blade
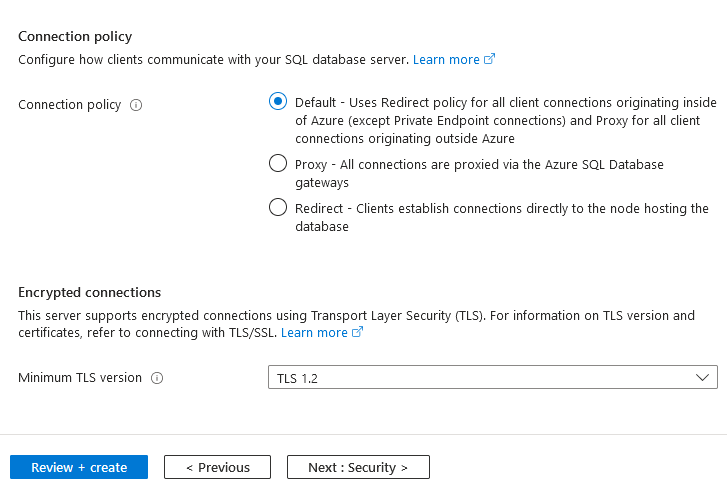
On the security blade, you can configure Microsoft Defender for SQL, Ledger, Server identity, Transparent data encryption key management, and Always encrypted.


You can investigate these options one by one, but for the majority of the time, I recommend accepting the security defaults. Azure SQL Databases have data encrypted in transit and at rest by default and the keys are automatically managed by Azure. Unless you have specific governance requirements, these defaults will work fine.
Click Next to move to the Additional settings blade.
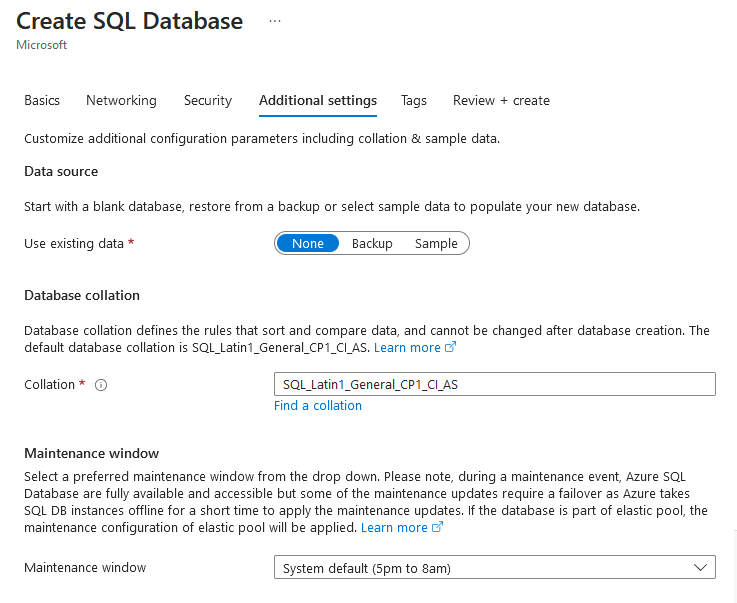
On the additional settings blade, you have the option to create a blank database, restore a backup from any existing database, or set up the Northwind sample database.
You can also change the default Database collation as well as configure the Maintenance window for the SQL instance.
Once you have set any settings you want changed, click Next to go to the Tags blade.
On the Tags blade, you can set any key/value pair tags for the resources. You can use this for additional reporting in areas like billing down the track.
Click Next to go to the Review and create blade.
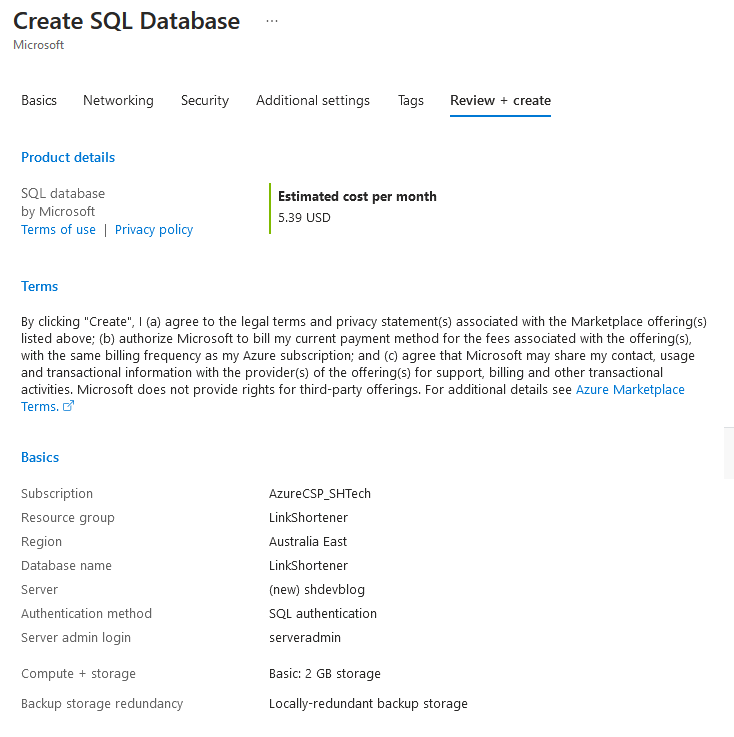
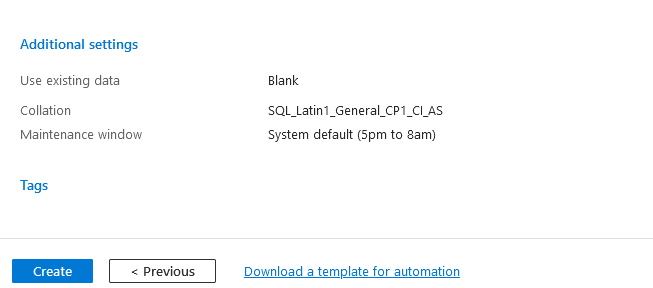
Assuming you’re happy with the settings, click Create. It takes about 5-8 minutes for the server and database to be created.
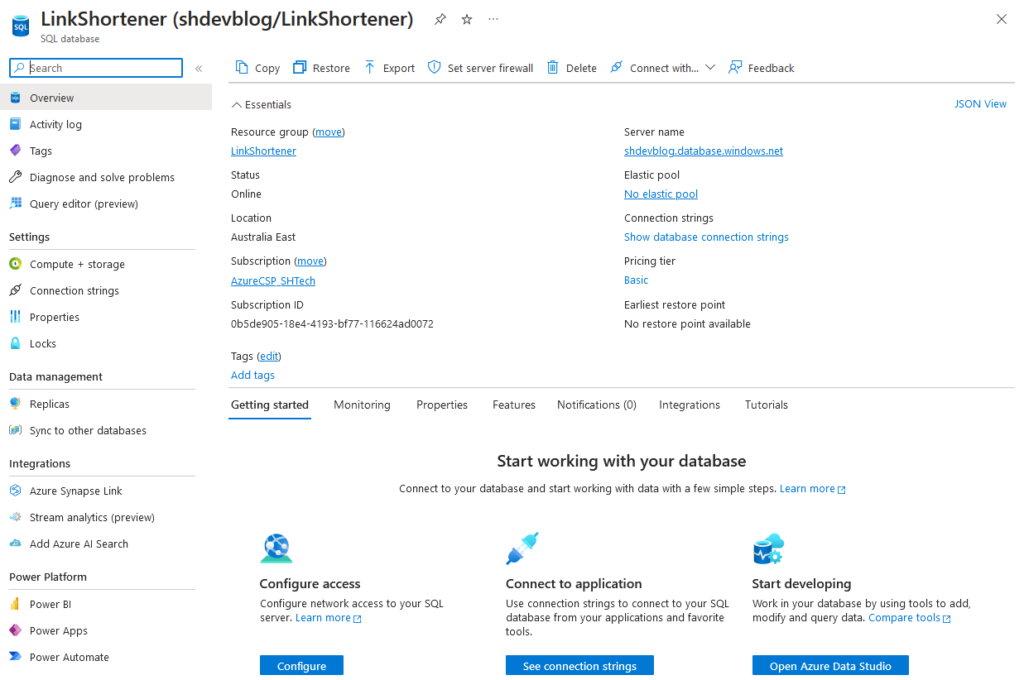
You can go to the SQL database overview to manage the database and find information like your connection string.
You can also get the fully qualified domain name of the server that you can enter into SQL Server Management Studio, or Azure Data Studio to connect to your database instance.