In this post, we’ll take a look at adding a domain to Microsoft365 and configuring your DNS records with an Amazon Route 53 DNS.
Fun Fact: The name Route 53 comes from the fact that DNS often detemines internet routing and the port used for DNS lookups is port 53!
Table of Contents
Create a Microsoft365 tenancy
The first step to getting a domain set up in Microsoft365 is to set up a tenancy.
A tenancy is a placeholder to contain your domains, user accounts, mailboxes, etc.
If you’re in Australia and want us to help you get all this set up, then you can contact us at Expeed
For anyone else, you can go through Microsoft’s public site to purchase licenses. The Business grade licenses are over at https://www.microsoft.com/en-au/microsoft-365/business/compare-all-microsoft-365-business-products
Add domain to Microsoft365 tenancy
When you get your tenancy set up, you can add your own domain by following these steps
Log in to the Microsoft365 portal at https://portal.office.com.
Click on the Admin icon on the left menu, which will take you to the Microsoft 365 admin center
Click on “…Show all” in the left menu to expand out all menu options
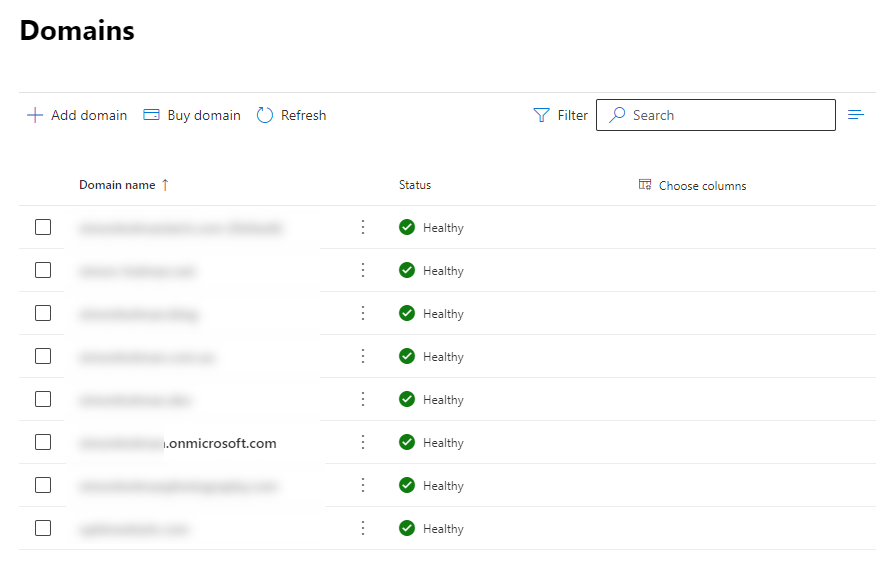
Expand the Settings menu, then click Domains to load the domain page. You will see that there is already an *.onmicrosoft.com domain present. This is the default domain configured for your tenancy.
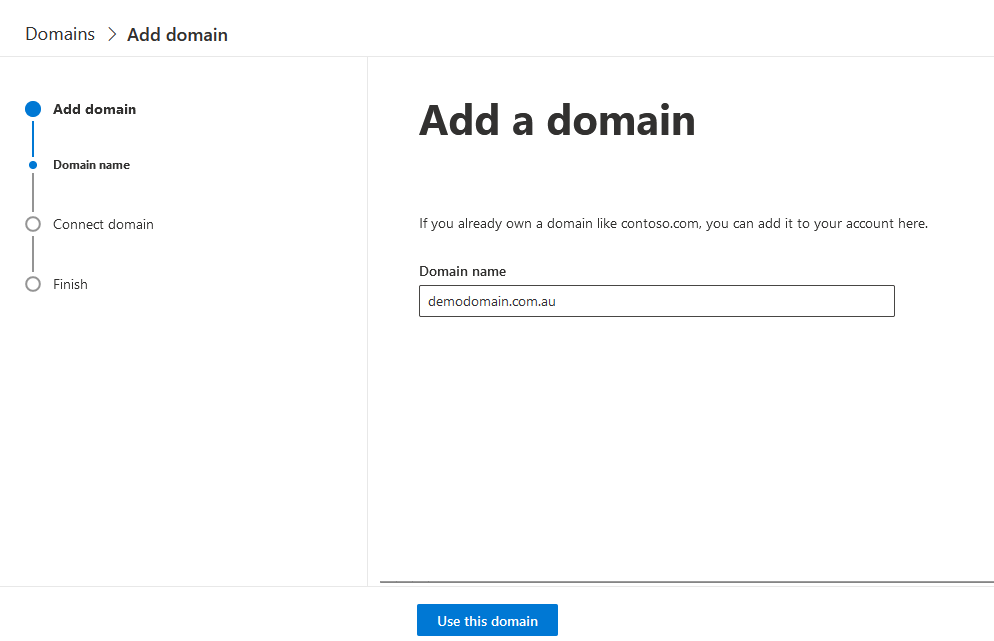
Click on Add domain at the top to add a new domain. In our example, we’ll use demodomain.com.au
Enter your domain name and click the “Use this domain” button
The next step is to verify that you own the domain which we’ll work through in the next section
Validate your domain in Microsoft365
Click the Add domain button and enter the name of your domain, then click Use this domain. For this example, we’ll use demodomain.com.au
You’ll them be prompted with 3 options to validate the domain to prove to Microsoft that you own and have management capabilities over that domain. In this example, we’ll be looking at the first option, which is “Add a TXT record to the domain’s DNS records”. Select this option and click continue.
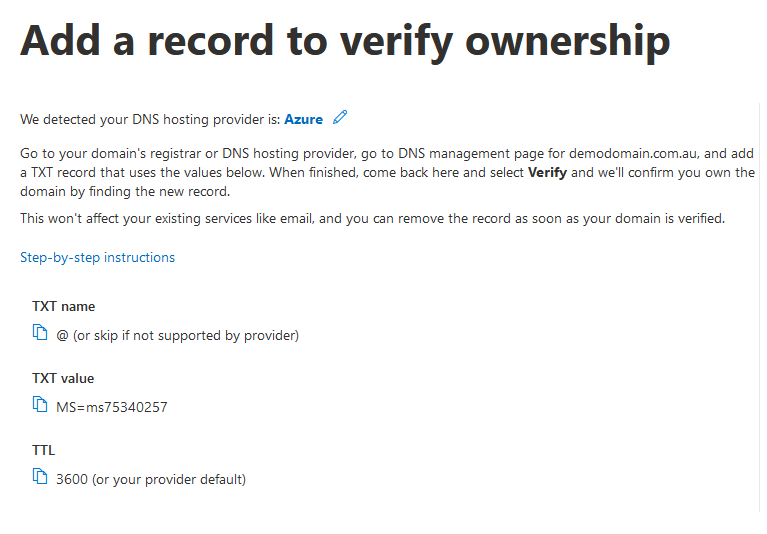
You will then presented with the DNS information for the required TXT record. From here we need to head over to Azure DNS to add the DNS records in.
Add your domain validation record in your Amazon Route 53 hosted zone
If you’ve created a hosted zone for your domain in AWS, then you’ll see something like below.
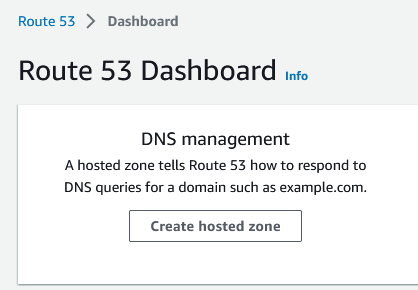
If you have’t created your hosted zone, head over to the Route 53 dashboard and click on the Create hosted zone button
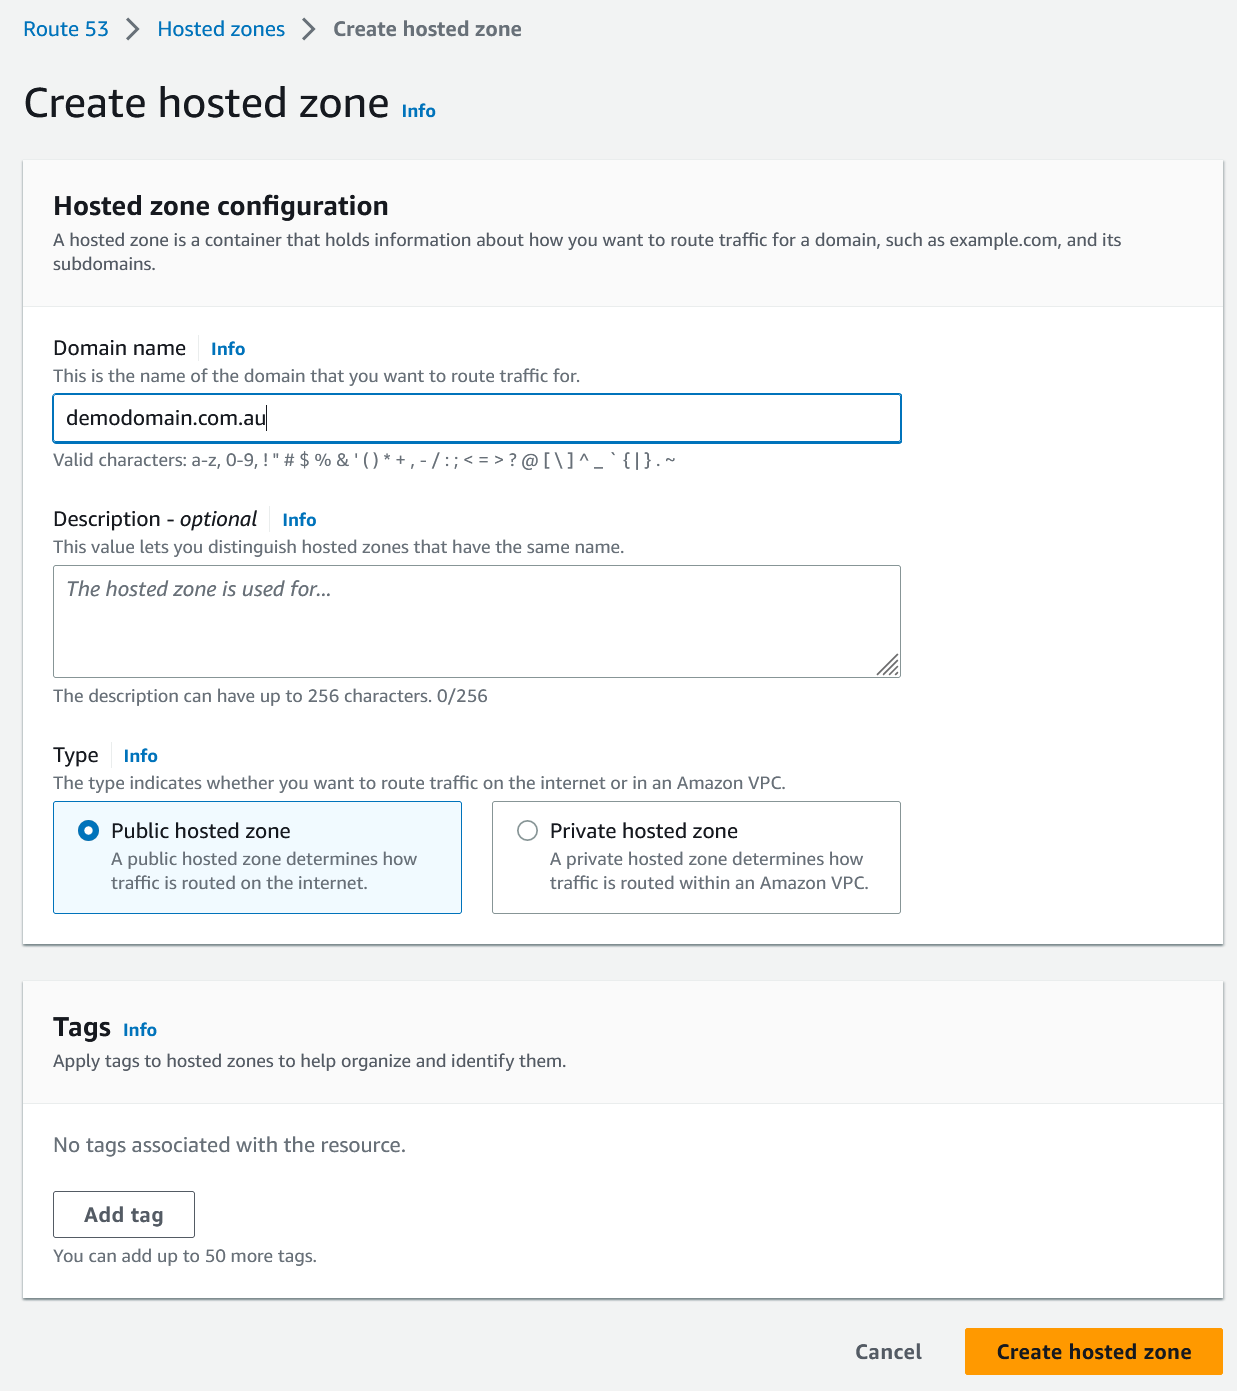
You can enter the name of your hosted zone, ensure that Public hosted zone is selected, the click the Create hosted zone button…..again!
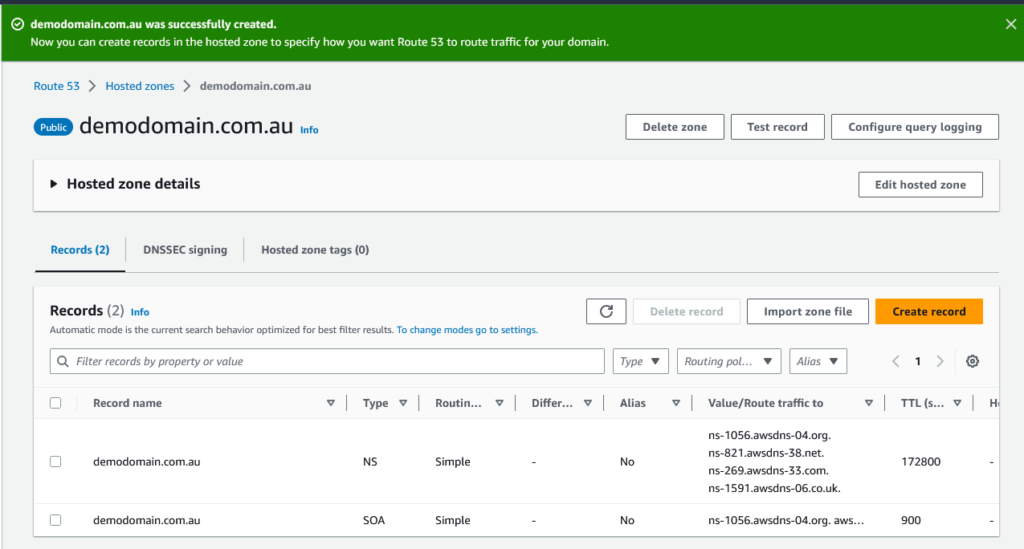
You’ll now have an empty hosted zone
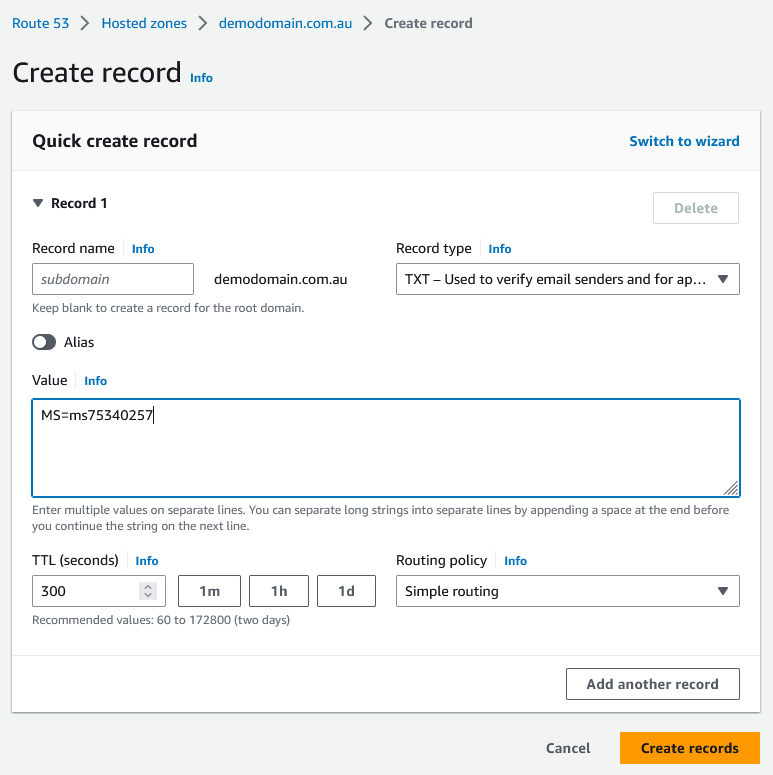
From here you can click on the Create record button to add a record to your DNS.
As this is a top level domain level record which is shown by the TXT Name of “@ (or skip if not supported by provider)“, you leave the Record name option blank. Change the Record type option to TXT and add the TXT Value provided in Microsoft365 into the Value field and click Create records.
Now that we’ve added our validation TXT record, we can switch back to Microsoft365 to verify the domain. Adding this record proves to Microsoft365 that we have administrative access to the domain.
Once the domain is verified, we have the option of how we want to connect our domain. If Microsoft365 detects that our domain is managed by a DNS system that they can integrate with, like Cloudflare, it will give you the option to login to your Cloudflare account to automatically set up the records.
Now doing things automatically isn’t very fun, and we don’t learn anything right!! So we’ll do it manually. Interestingly they don’t seem to have an integration with their own Azure DNS for now, which I would have thought would have been the first one to be integrated. Anyway, let’s move on by selecting “Add your own DNS records” and clicking Continue.
Point your email to Microsoft365
Once you have your domain verified, you can start adding users, groups, and doing any other configuration that you need, but email for your domain will not flow through to your Microsoft365 tenancy just yet. For that to happen, you need to change the following DNS records that Microsoft365 provides to you.
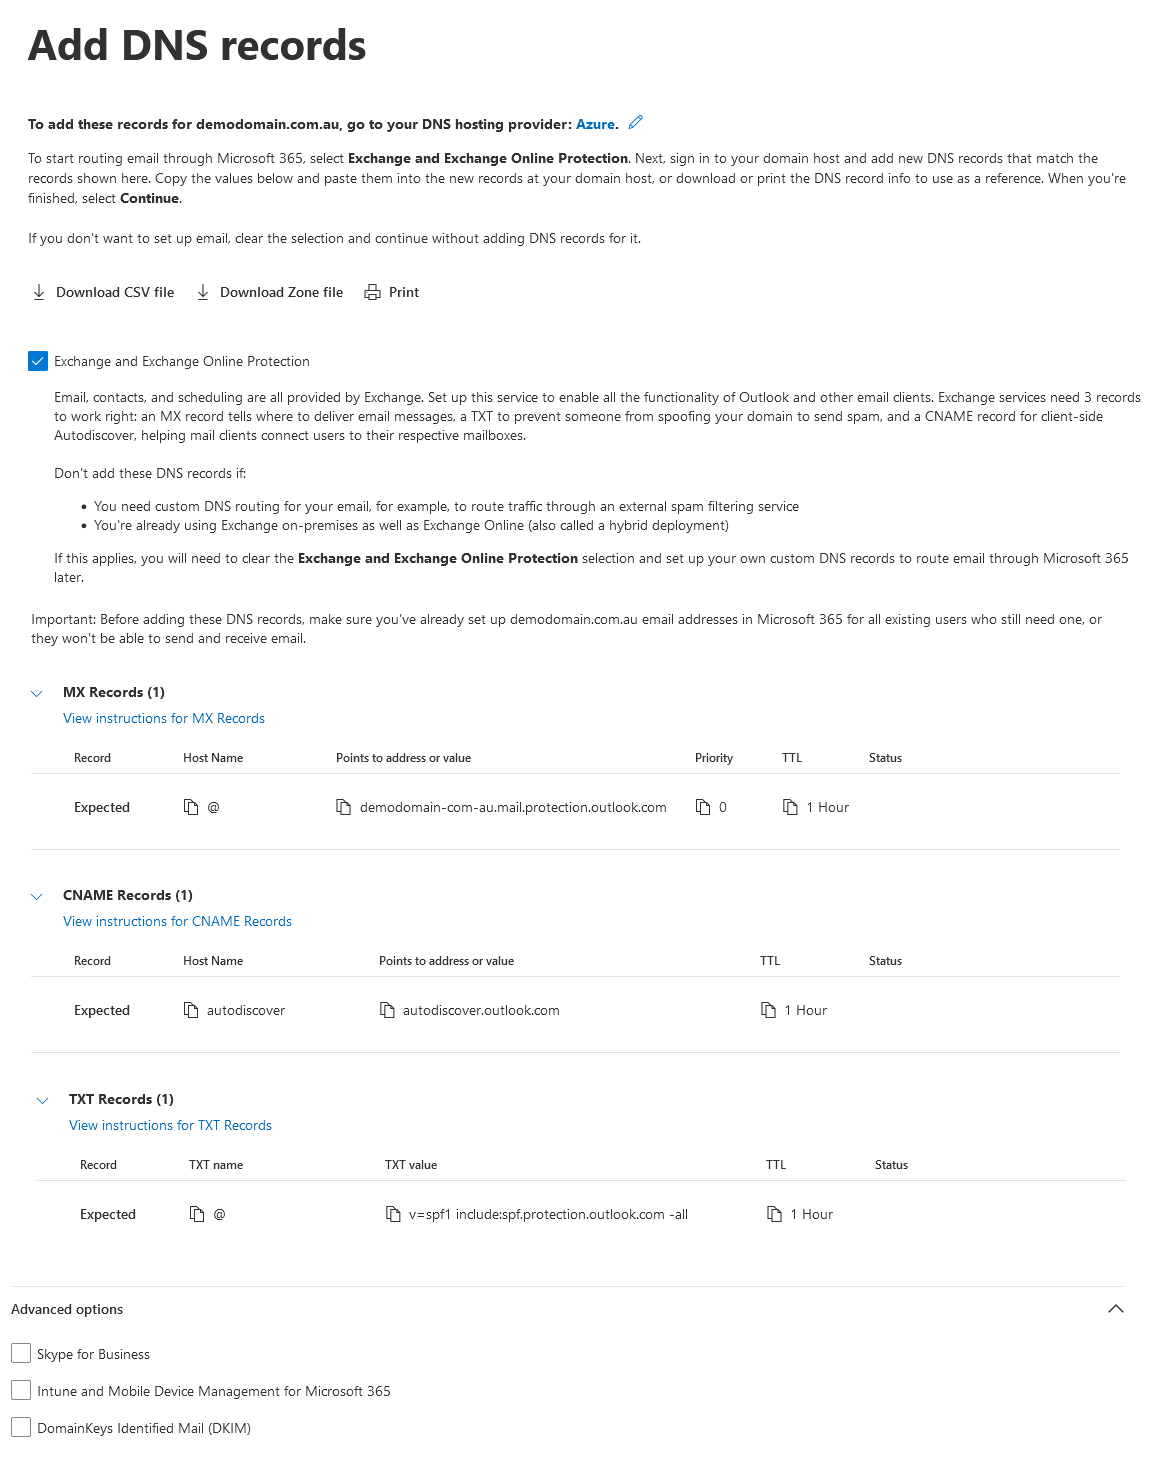
There are three primary records that you need to add to make your email work correctly.
An MX record which tells the internet where to send your email.
A CNAME record for autodiscover, which helps email clients like Outlook automatically configure itself with your mailbox settings.
And your SPF TXT record, which is a security mechanism that tells email servers that are receiving email from your domain which servers you’ve authorised to send email on your behalf. If you’re keen to find out more about SPF, you can have a read of this article Set up SPF to help prevent spoofing. Note that this does say “help”! SPF is not a silver bullet to stop spoofing but it helps.
Adding your MX, CNAME and TXT records to Amazon Route 53
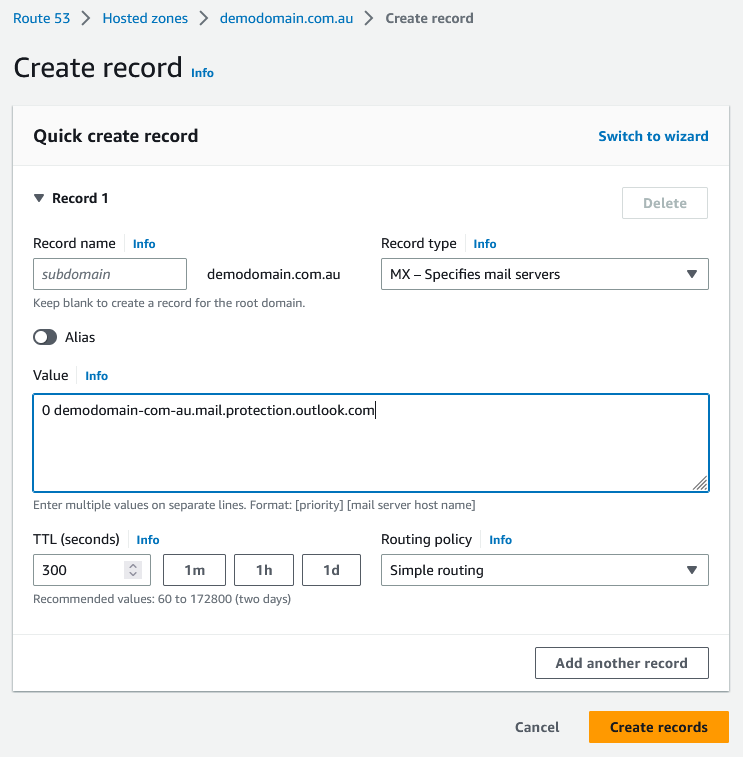
Back over in the AWS hosted zone editor, click the Create record button again to add a new record, then change the Record type to MX.
As this is a top level record, the Record name field is left blank. In the Value field add the preference followed by a space followed by our email server name provided by Microsoft365 in the screenshow above. In our instance this will be “0 demodomain-com-au.mail.protection.outlook.com”, then click Create records.
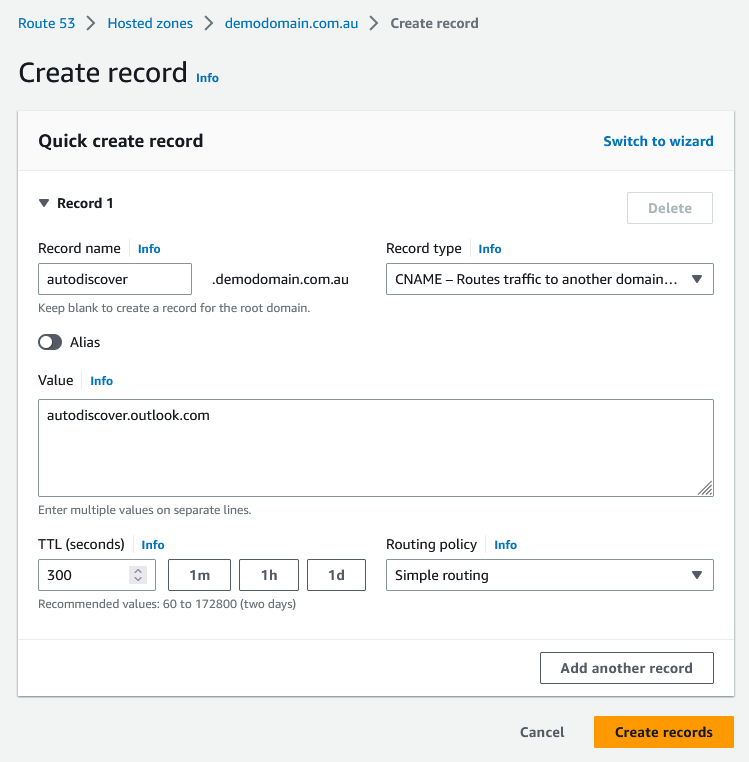
Adding our CNAME record follows much the same process. Click Create record again to add a new record, then change the Record type to CNAME. The Record name property is set to “autodiscover”, and the Value field is set to “autodiscover.outlook.com”, then click Create records.
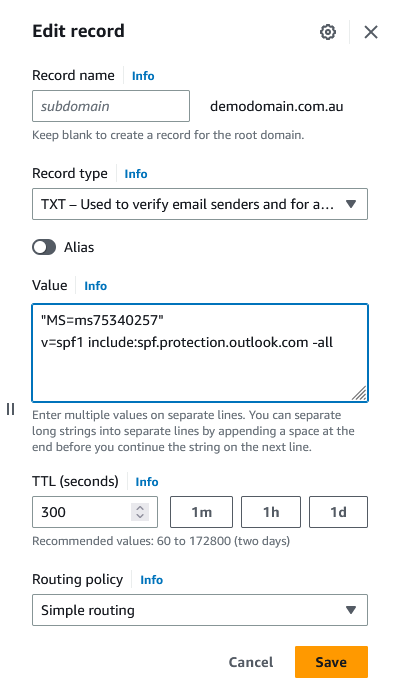
The final record is the TXT record. Now we already have a top level TXT record for our domain that we used to add the verification record to, so we need to edit that record and append the SPF record information.
So in your zone editor, click on the checkbox to the left of the existing TXT record and a Record details blade will show on the right. Click on the Edit record button to open the record for editing
You can then add the SPF record provided by Microsoft365 to the next row down in the TXT record’s Value box. Now click Save in the bottom right to save the record.
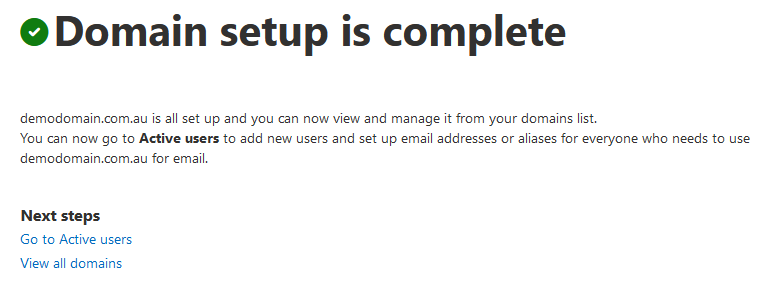
Now that all our DNS entries are added, we can switch back to Microsoft365 and click Continue to verify the records.
If you’ve entered the records correctly you should see a confirmation message.
Summary
You’ve now successfully added your domain to Microsoft365 and set up your DNS records with Amazon Route 53 hosted zones.
I’m keen to hear if your using Amazon Route 53 hosted zones for your domains, so please comment below and let me know what you think of Amazon Route 53 hosted zones.