If you’re using Azure for other services, then it makes perfect sense to also use Azure Public DNS Zones to host your domain and manage your DNS. You’ll be building on top of the massive infrastructure that Azure already has in place to manage it’s own internal and external DNS.
Table of Contents
Create an Azure Public DNS Zone
To add a new DNS zone in Azure, click on “Create a resource” from the left menu, the Search for “DNS Zone“
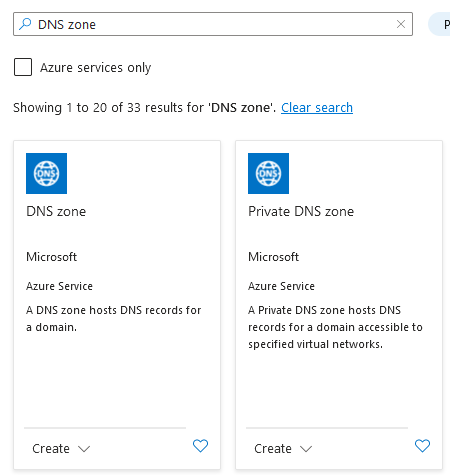
You want to select the option titled “DNS zone“, NOT the one titled “Private DNS zone“.
DNS zone’s cost about USD $0.50 per month, so they’re very cheap to run.
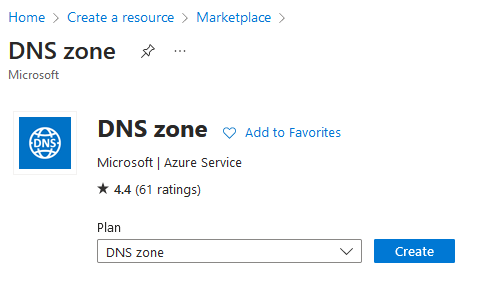
Once you’ve clicked Create, you’ll be taken the DNS zone detail screen where you can confirm your resource creation.
Once you click Create on this screen, you can then select a Subscription for your new DNZ zone to exist in, select or create a new Resource Group, add your domain name, then select the Resource group location (assuming you created a new resource group). I typically have a “DNS” resource group and have all my domains in that.
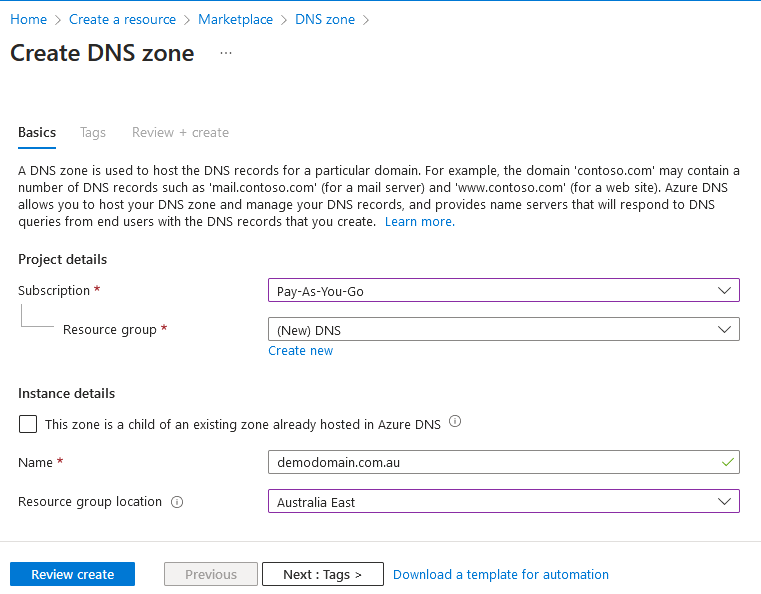
From here, you can step through to the Tags tab to add any Tags you see fit, but I typically just click “Review Create“, then Create to create the DNS zone.
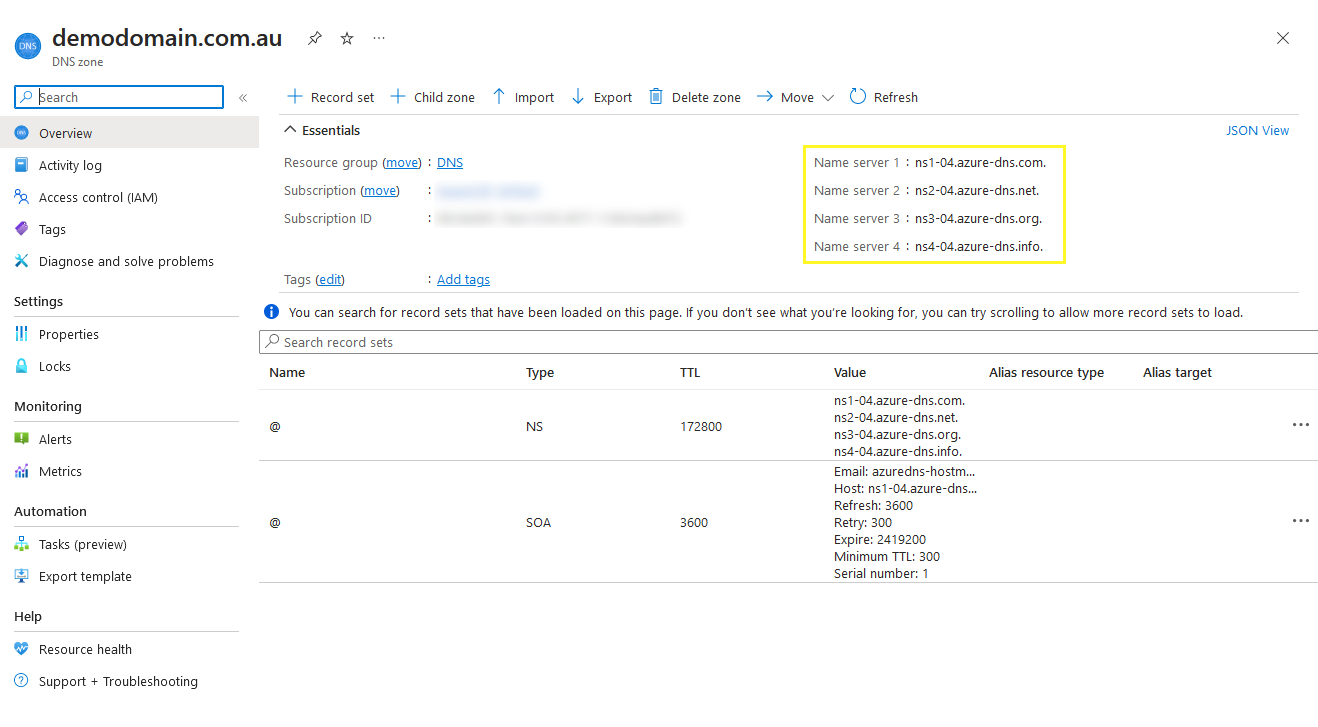
Once your domain is created, you will see the DNS zone settings and two pre-configured DNS records. These two records are the NS record (which indicates which DNS server is authoritative for that domain) and the SOA record (which stores important information about a domain or zone such as the email address of the administrator, when the domain was last updated, and how long the server should wait between refreshes)
Most of the time, you will never need to worry about these records, just don’t delete them as they’re required to ensure the DNS works correcly for your domain.
Check your nameservers
Probably the most important part about this DNS zone at this stage is the 4 Name server records at the top right of the Essentials area (highlighted by the yellow box above).
You can configure DNS zones in multiple places (Azure, Cloudflare, Amazon AWS, your local web hosting company) but only the nameservers that are set in your domain registration are actually active.
So how do you know which nameservers are active for your domain? I’m glad you asked.
I use a neat little website called IntoDNS. If you visit IntoDNS, enter your domain and click Report, you will get a neat little report that lists at the very top what your active nameservers are. As you see, the listed nameservers match what Azure shows in the yellow box, so our domain is looking at these records.
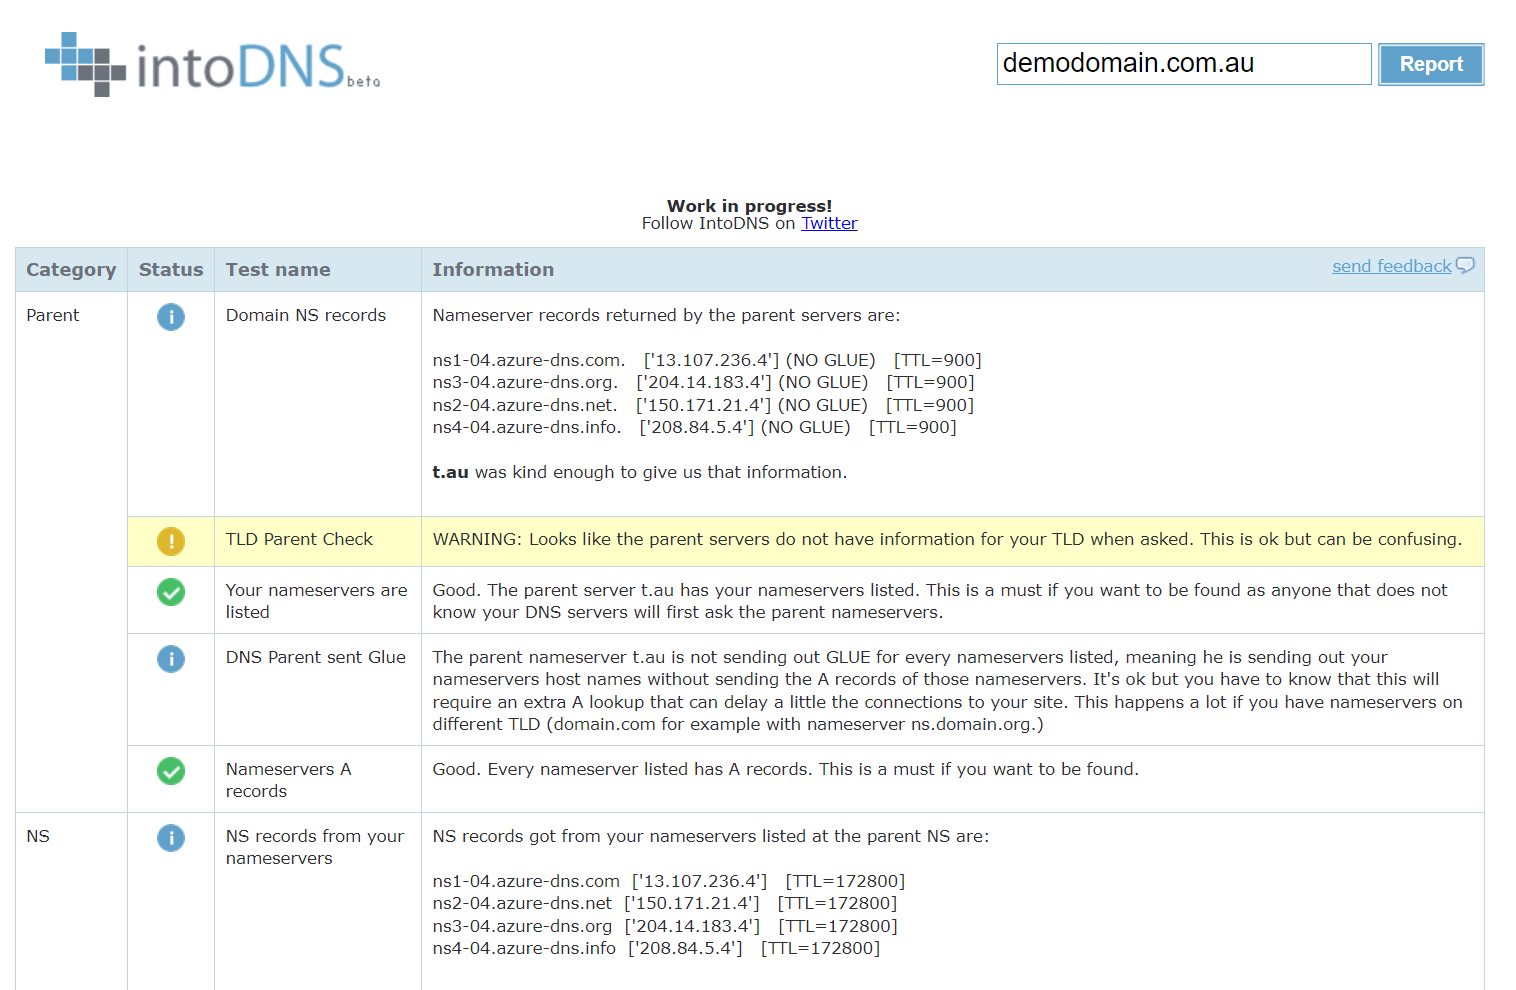
You can ignore the yellow “TLD Parent Check” warning box. This is just because we haven’t added any DNS records yet.
Updating the nameservers for your domain
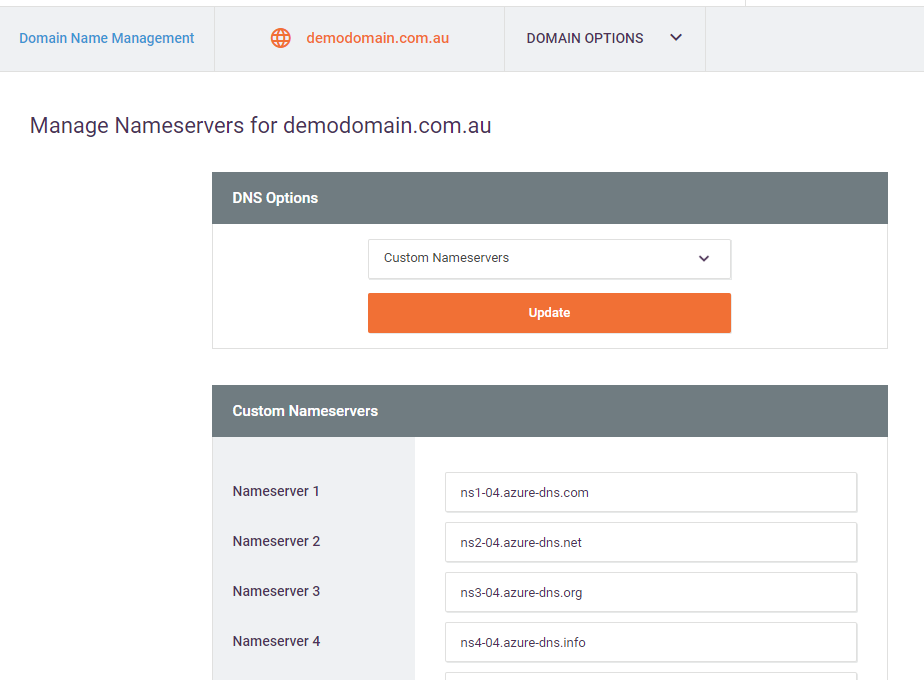
If you login to your domain registrar and edit your domain, you will see an option to update nameservers.
In my domain control panel, it looks like below.
Adding DNS Records
To add a DNS record to the domain, click the “+ Record set” button and a blade will slide out on the right hand side.
The first thing to do here is select the type of record you want. The most common DNS records are A, CNAME, TXT, and MX
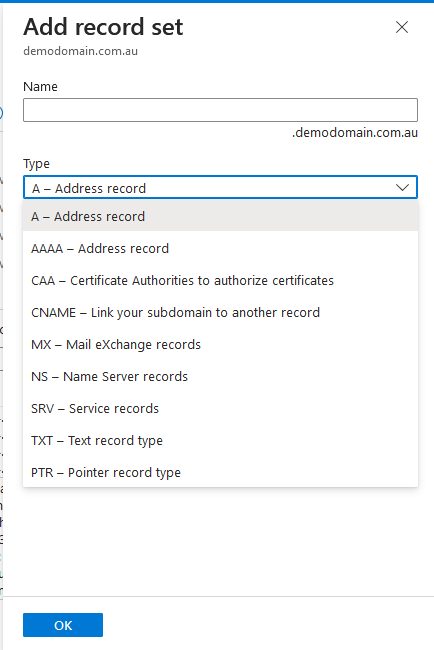
The type of record you select will determine which options you will be able to set.
Primary Types of DNS Records
A Record
An A record is a direct pointer from a domain name to an IP address.

Name: The name of your record. i.e. “shop” will result in a record for “shop.demodomain.com.au”
Alias record set: Used to alias the record to another zone or Azure service. Not covered in this post
TTL: The Time to Live of the record. This tells downstream DNS servers how long to cache this record for. If you’re planning to change a DNS record soon, you would reduce the TTL a few days leading up to the change to ensure that your change is reflected by DNS servers faster.
IP Address: This is the IP address that the record will point to. Note that multiple IP addresses can be included. This will typcially result in a round robin style of use by the reader of this record, so multiple records should only be added when the consequences are understood.
* This should be an IPv4 address only. AAAA type DNS Records are for IPv6 ip addresses
CNAME Record
The CNAME record is basically an alias record. It points one DNS record to another.
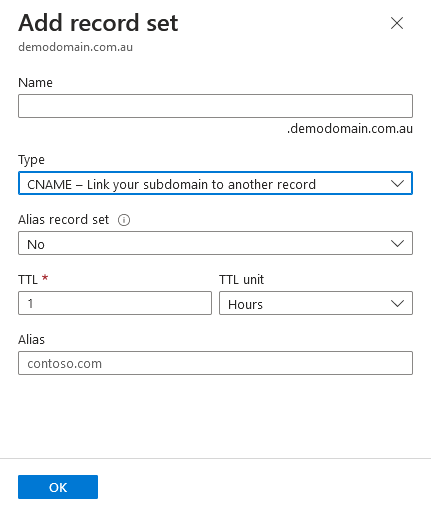
Name: The name of your record. i.e. “shop” will result in a record for “shop.demodomain.com.au”
Alias record set: Used to alias the record to another zone or Azure service. Not covered in this post
TTL: The Time to Live of the record. This tells downstream DNS servers how long to cache this record for. If you’re planning to change a DNS record soon, you would reduce the TTL a few days leading up to the change to ensure that your change is reflected by DNS servers faster.
Alias: This is the full qualified domain name address that the record will point to. If you’re adding something like a custom domain to an Azure App Service, this may be something like “demodomain.azurewebsite.net”, or if you’re setting up Office365, this might be “autodiscover.outlook.com”
TXT Record
A TXT record is typically a validation or informational record. TXT records are used by companies like Microsoft and Google to record validation records. They are also used for some email security records like SPF records.
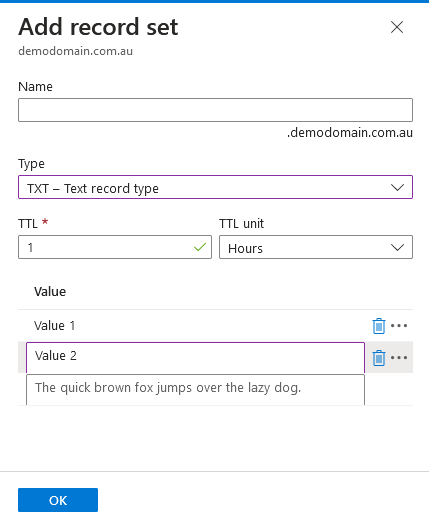
Name: The name of your record. The majority of TXT records (that I have seen at least) are to be set for the root domain (demodomain.com.au in our case), so the Name field is left blank.
TTL: The Time to Live of the record. This tells downstream DNS servers how long to cache this record for. If you’re planning to change a DNS record soon, you would reduce the TTL a few days leading up to the change to ensure that your change is reflected by DNS servers faster.
Value: The TXT record in Azure DNS is slightly different to other record types as it allows for multiple value entries at can be for complete different reasons. So your Microsoft Office365 domain validation record and your SPF record, and your Google domain validation entires may all be within this one record.
MX Records
MX records are Mail Exchanger records. They’re there to tell anyone that’s sending you email where your email server can be located.
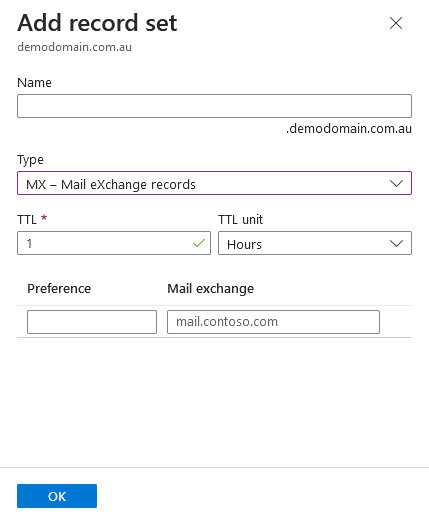
Name: The name of your record. MX records are typically set for the root domain (demodomain.com.au in our case), so the Name field is left blank.
TTL: The Time to Live of the record. This tells downstream DNS servers how long to cache this record for. If you’re planning to change a DNS record soon, you would reduce the TTL a few days leading up to the change to ensure that your change is reflected by DNS servers faster.
Preference: You can have multiple MX records for primary and backup email servers. Some providers like Microsoft handle this at the DNS level and only provide a single record for your MX, while others like Google use multiple MX records. The order in which the MX records are selected is by lowest preference (also called priority) to highest preference.
Mail exchange: This is the full qualified domain name of the server that is handling your email. So for Office365 this would be something like “demodomain-com-au.mail.protection.outlook.com”
Summary
Azure’s public DNS zones are very easy to setup, manage, and are very cost effective. I use them for a lot of my personal domains and domains that I manage.
Please let me know in the comments below who you’re using for your DNS.
If you enjoyed this article, you may like my article SendGrid Account Setup and Domain Verification with Azure DNS